Updated: 23 October 2023 • 6 minutes Read
In the last article, we guide you through checking the IP address on iOS (iPhone) and Android smartphones.
Whether you’re troubleshooting network issues or seeking enhanced privacy and security, understanding how to manage your IP address can be valuable. We will provide step-by-step instructions for iOS and Android platforms to help you accomplish these tasks effectively.
How to change the IP address of iOS (iPhone)
To change the local IP address on an iOS device, you can manually set a static or fixed IP address. Here are the steps to do this:
Note: Before proceeding, ensure that the IP address you intend to use is not already in use by any other device on your network. You must also know the subnet mask and the router’s local IP address.
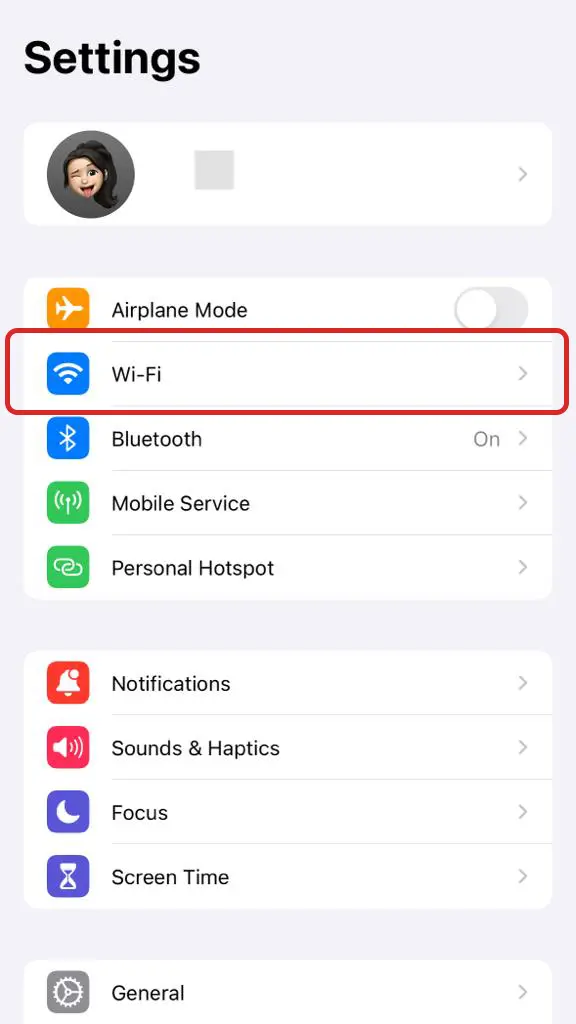
- Unlock your iOS device and go to the home screen. Open the “Settings” app, represented by a gear or cogwheel icon.
- Scroll down and tap on “Wi-Fi.”
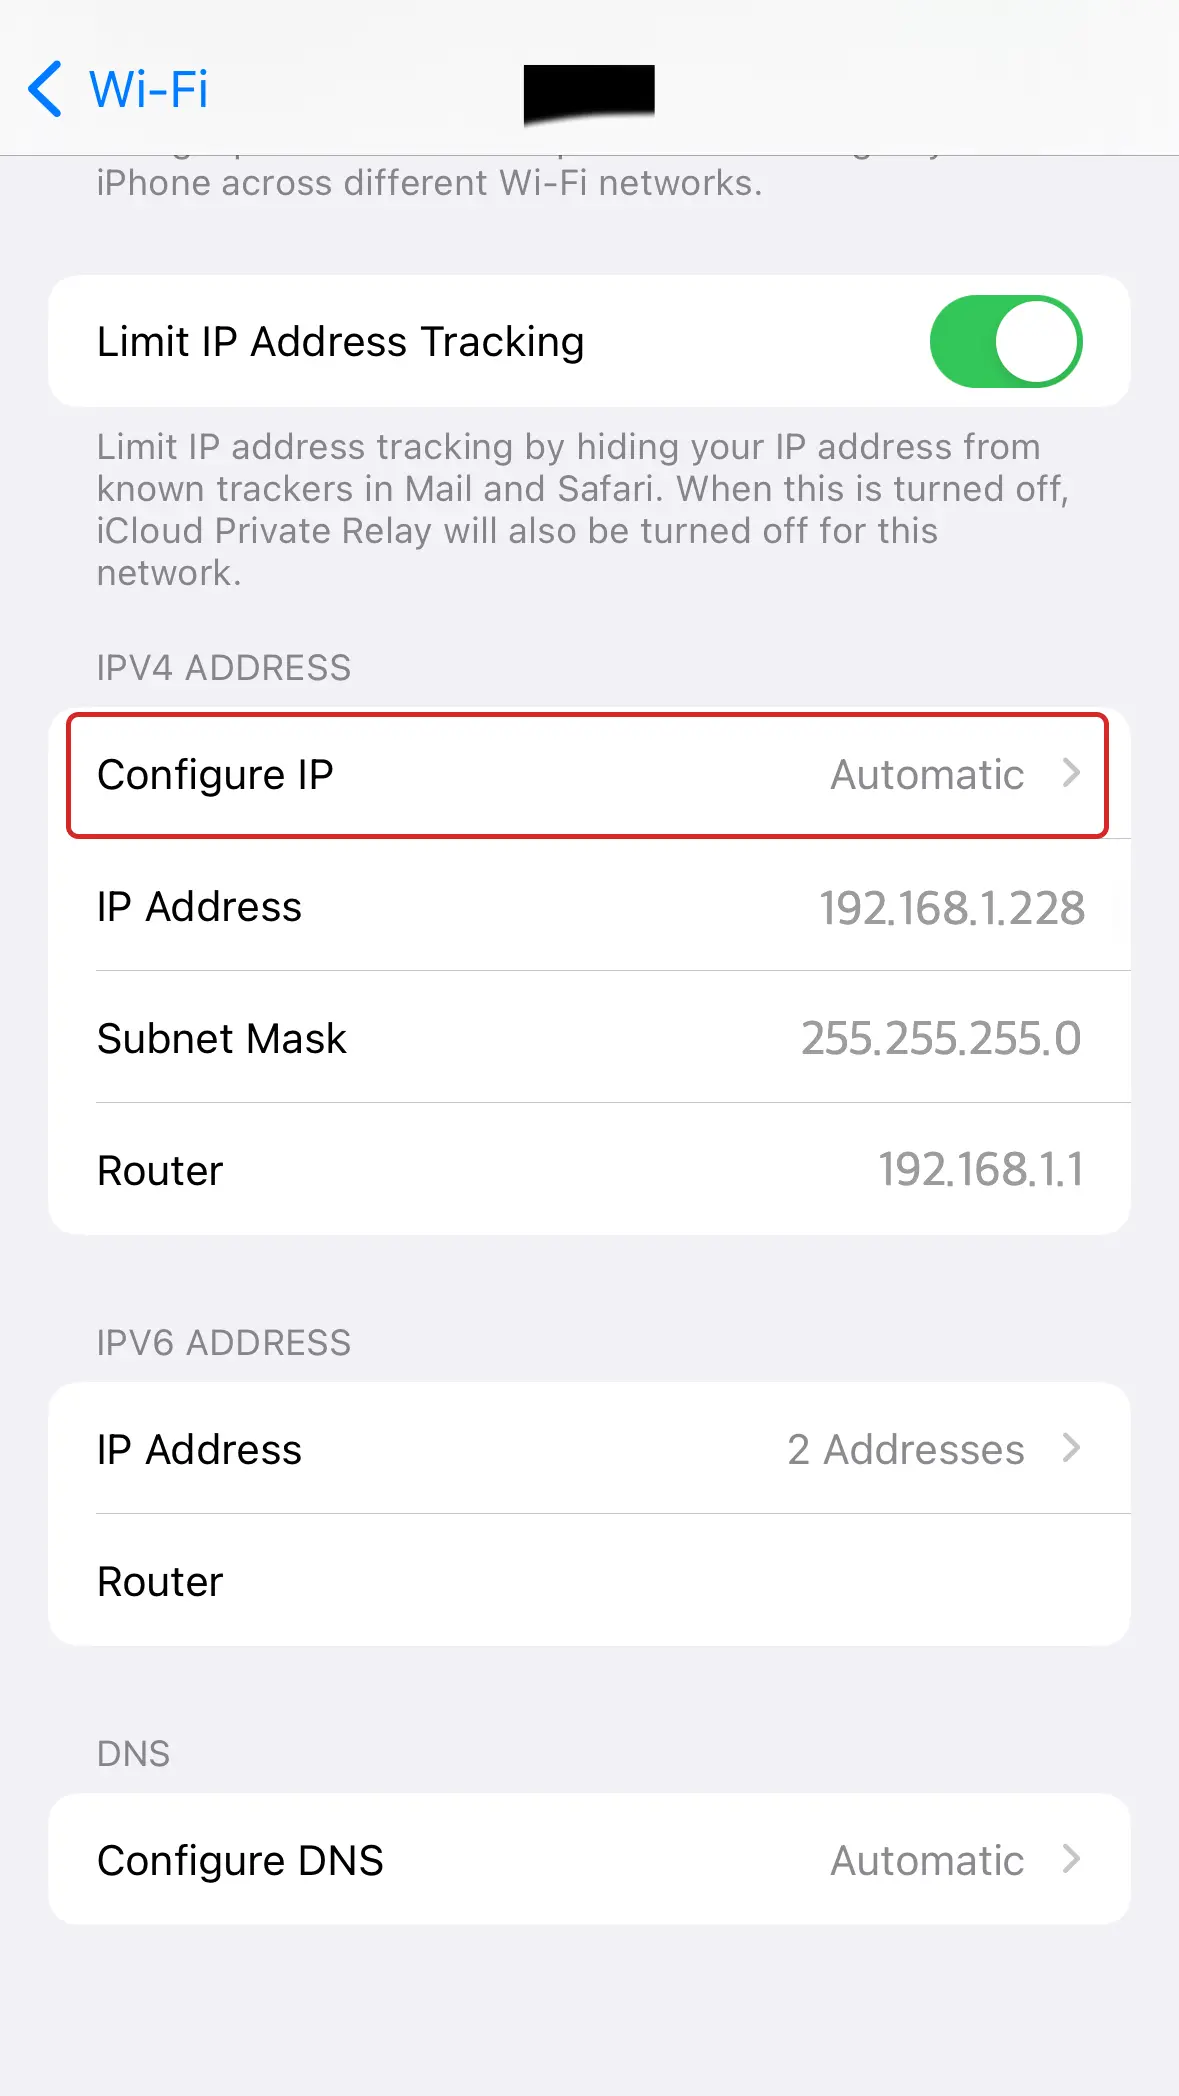
- Tap on the Wi-Fi network to which your iPhone is currently connected.

- You will see various details about your connection in the Wi-Fi network settings. Look for the “Configure IP” option and tap on it.
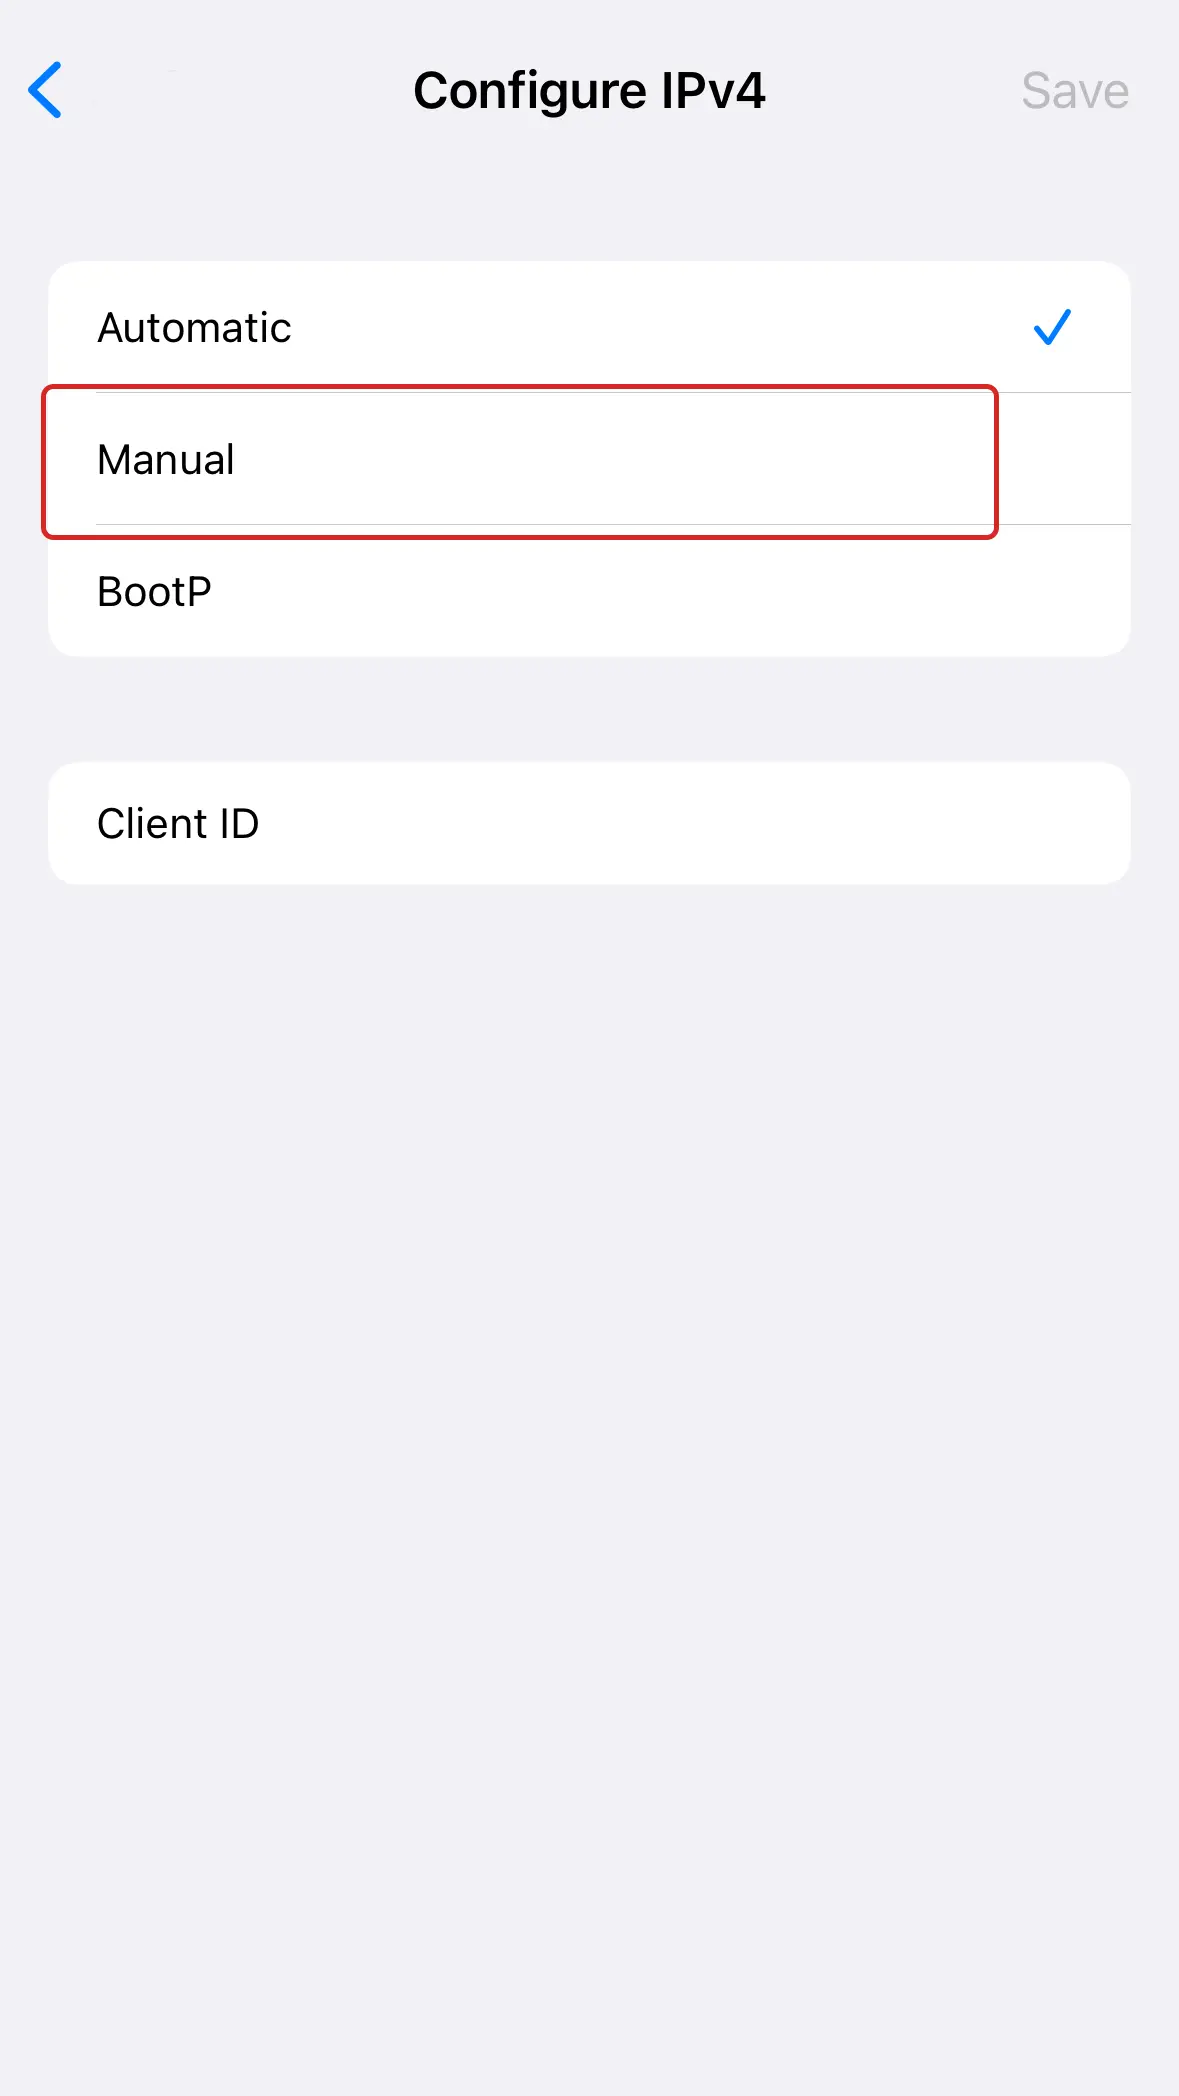
- In the IP settings, tap “Manual.”
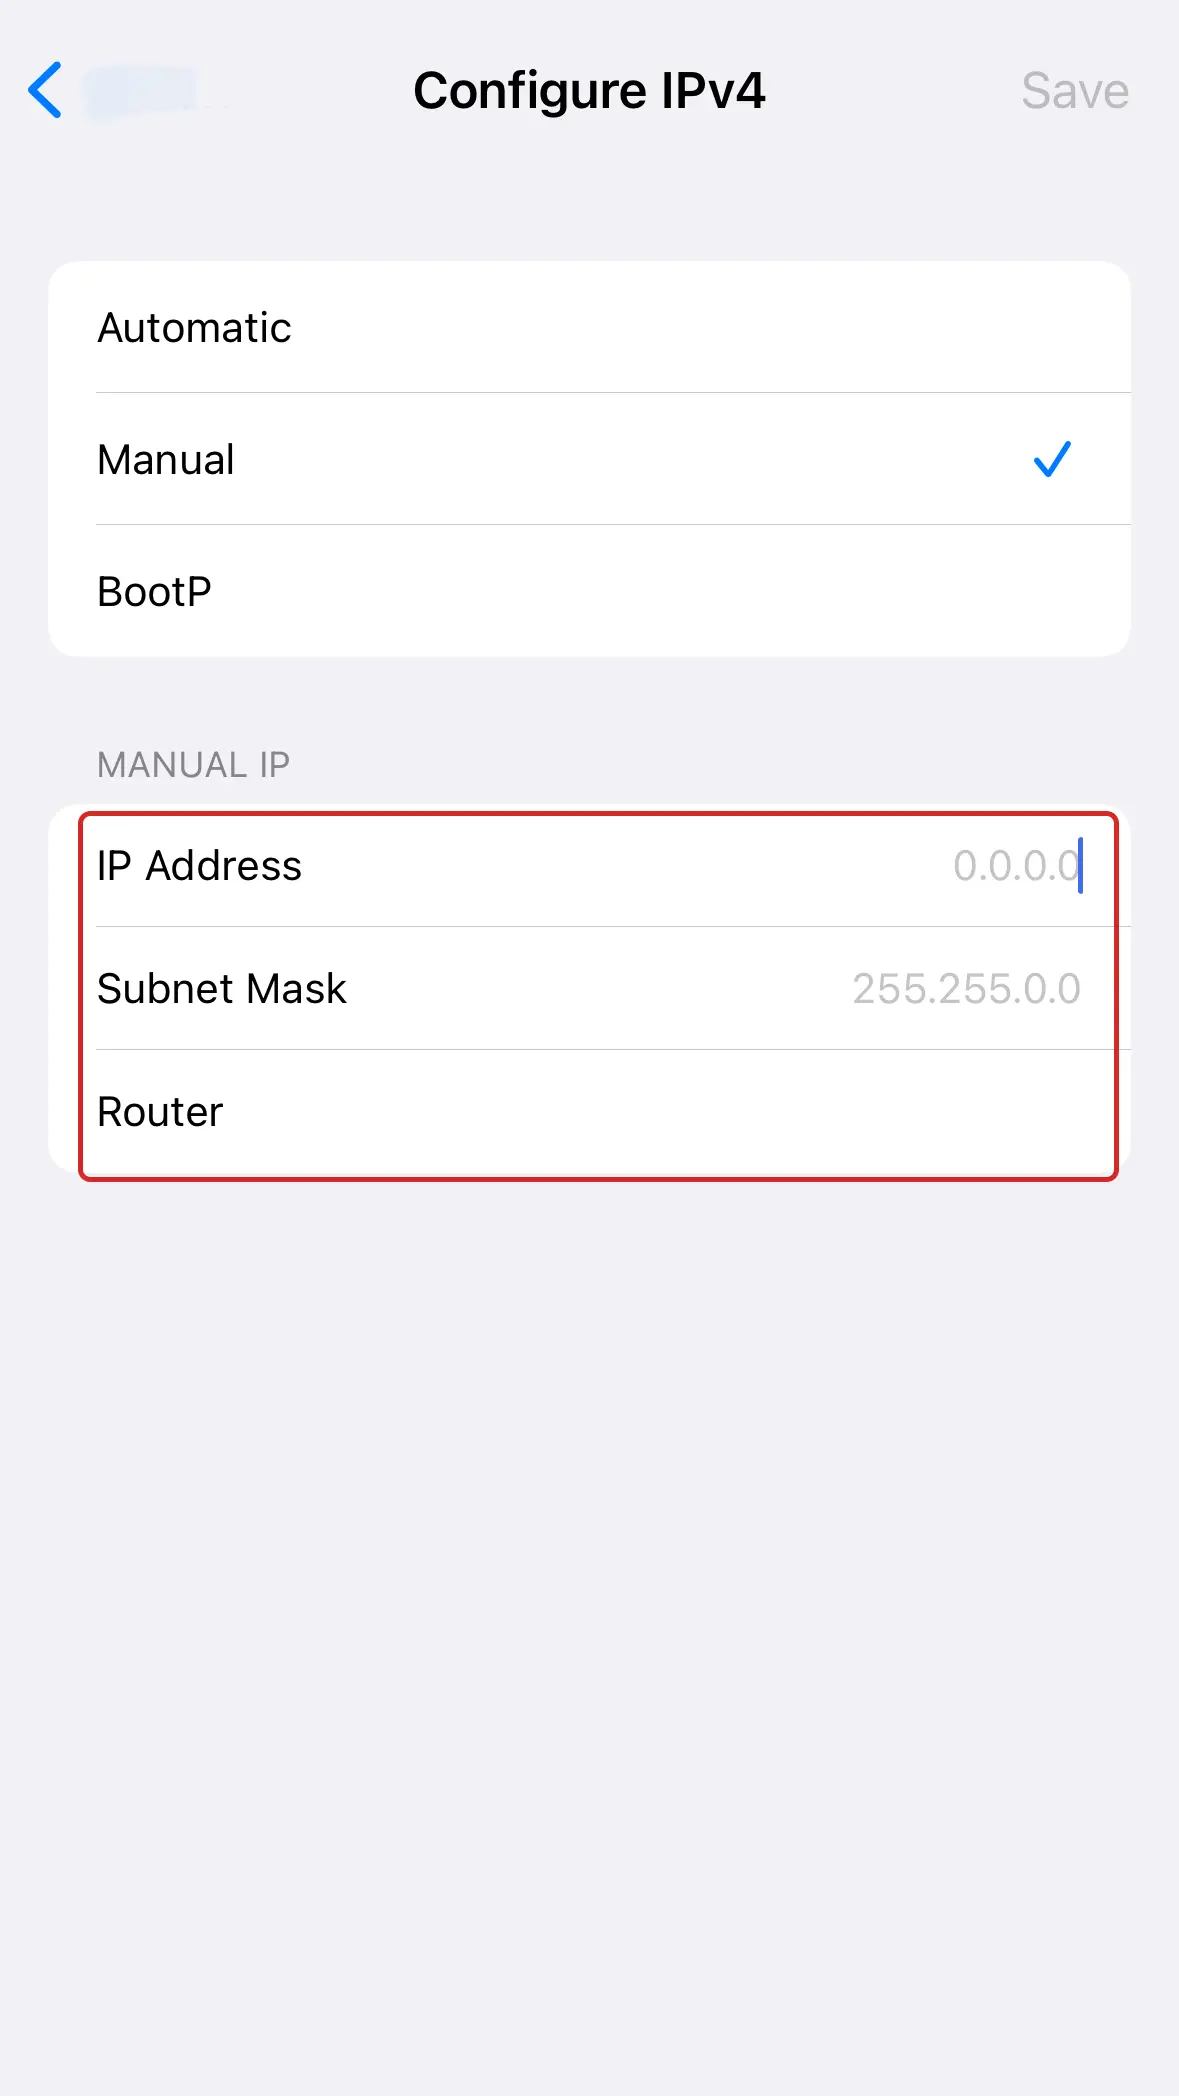
- Now, you can enter the desired IP address, subnet mask (usually 255.255.255.0), and router’s local IP address. Make sure the IP address is unique and not in use by any other device on your network.
- After entering the necessary details, tap “Save” or “Apply” to set the new static IP address.

Note: To ensure the changes take effect, you should disconnect from the Wi-Fi network and reconnect to it.
Following these steps, you can set a fixed or static IP address for your iOS device. It can be helpful in scenarios where you must ensure a consistent and known IP address for your device on your local network. Be cautious to avoid IP address conflicts, as using an IP address already assigned to another device can cause network issues.
How to change Android IP address
On Android, local IP addresses are dynamically assigned by DHCP, so change that setting to “static” and configure it to use the specified IP address.
Changing the IP address on an Android device is relatively straightforward, similar to iOS. You can specify a static IP address or change your global IP address. Here’s how to do both:
Change Android local IP address
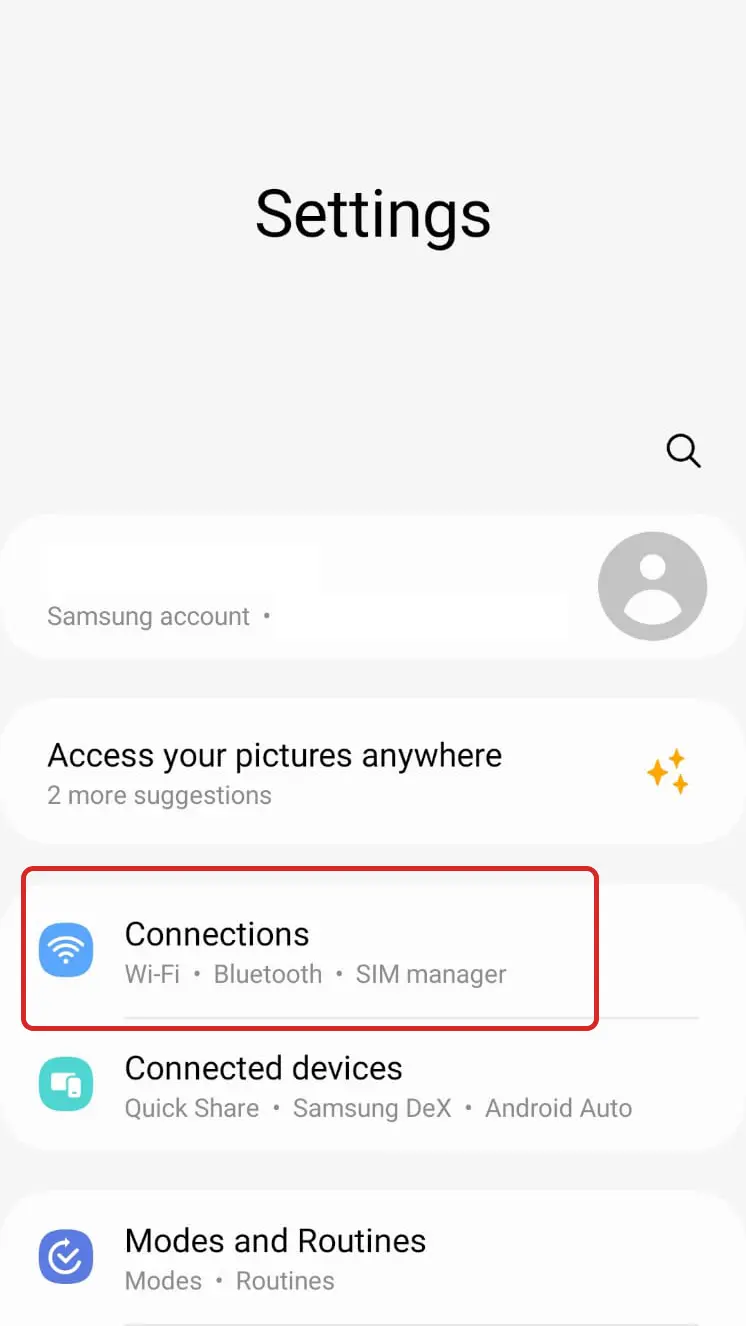
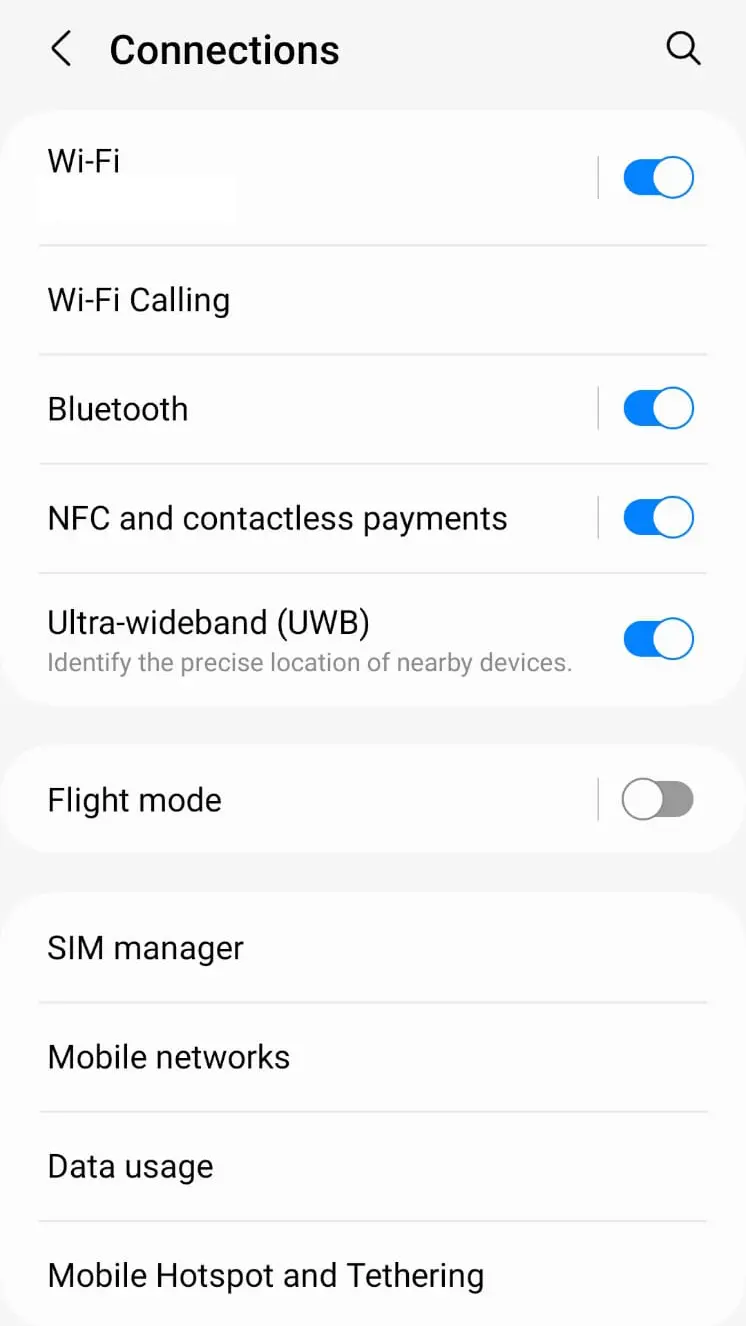
- Open your Android’s “Settings” and tap “Connections”.
- Tap the Wi-Fi network you’re connected to.
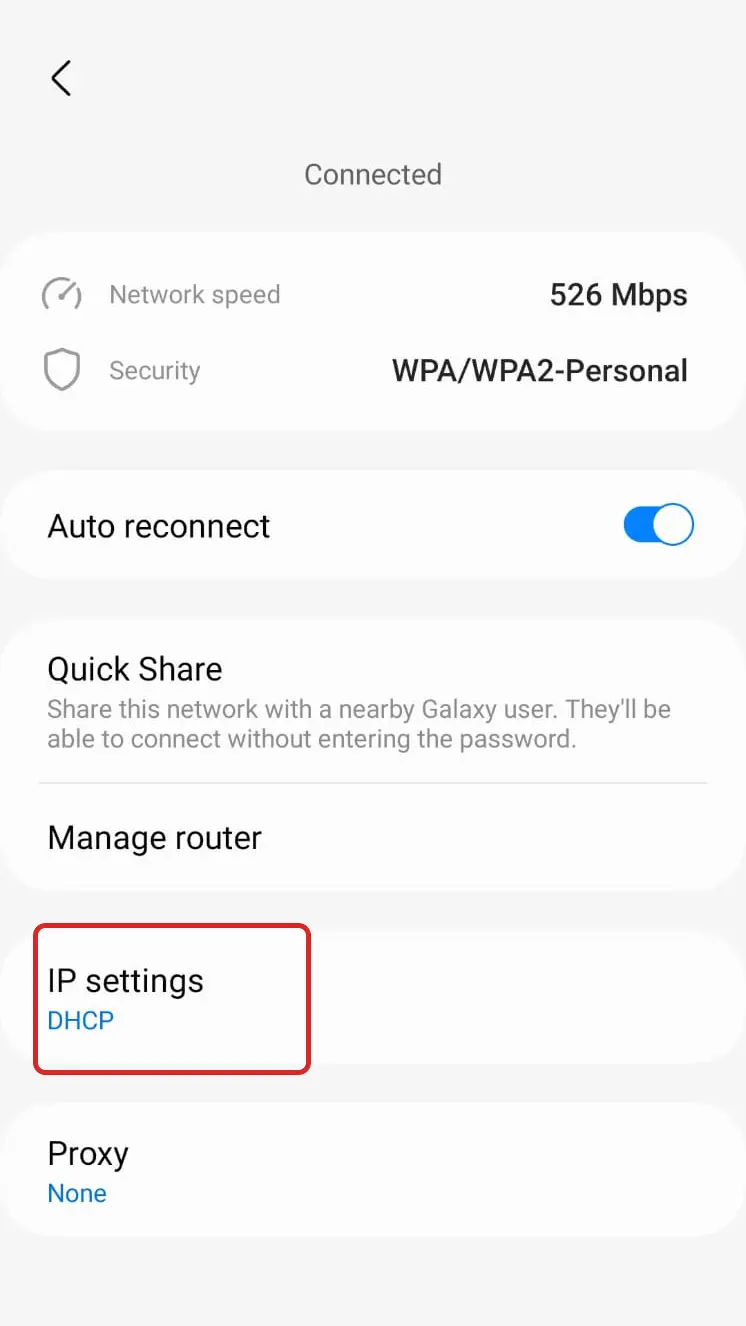
- Scroll down to see the details of the Wi-Fi network you are connected to. An item called “IP Settings” says “DHCP”, so tap on it.
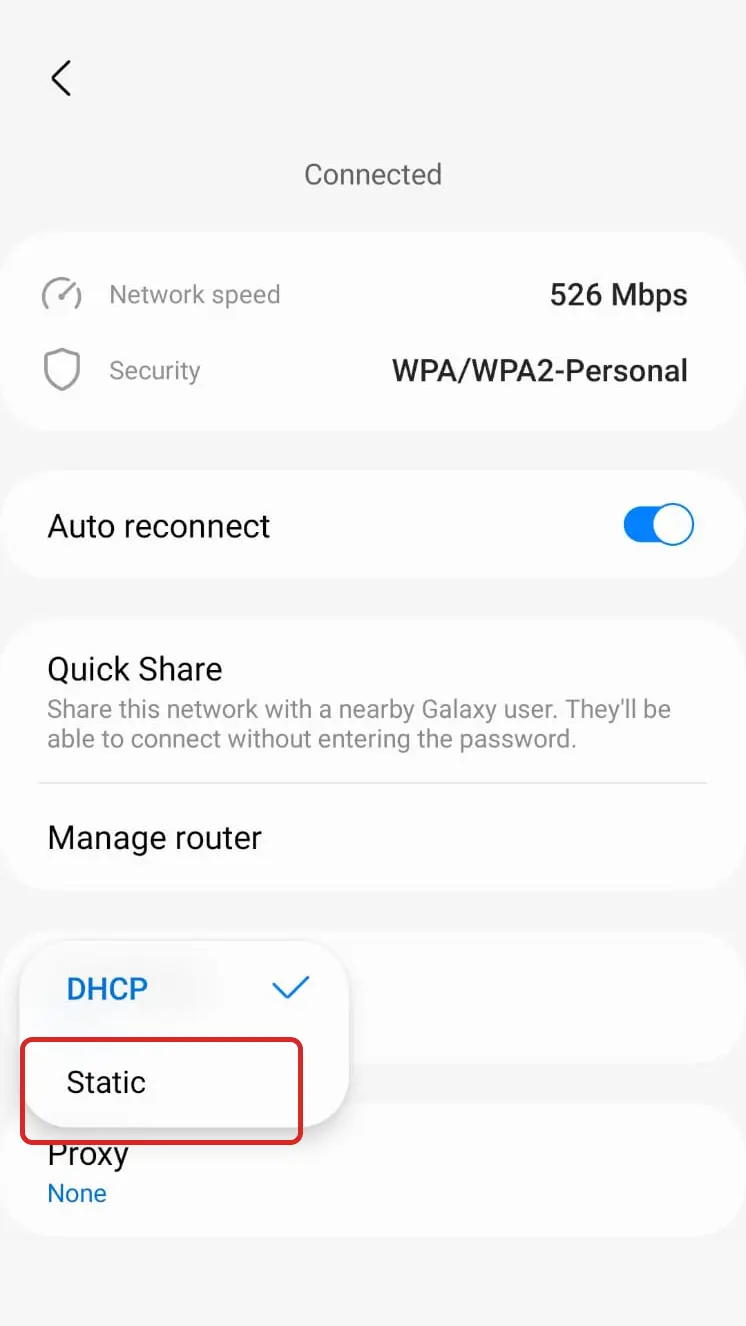
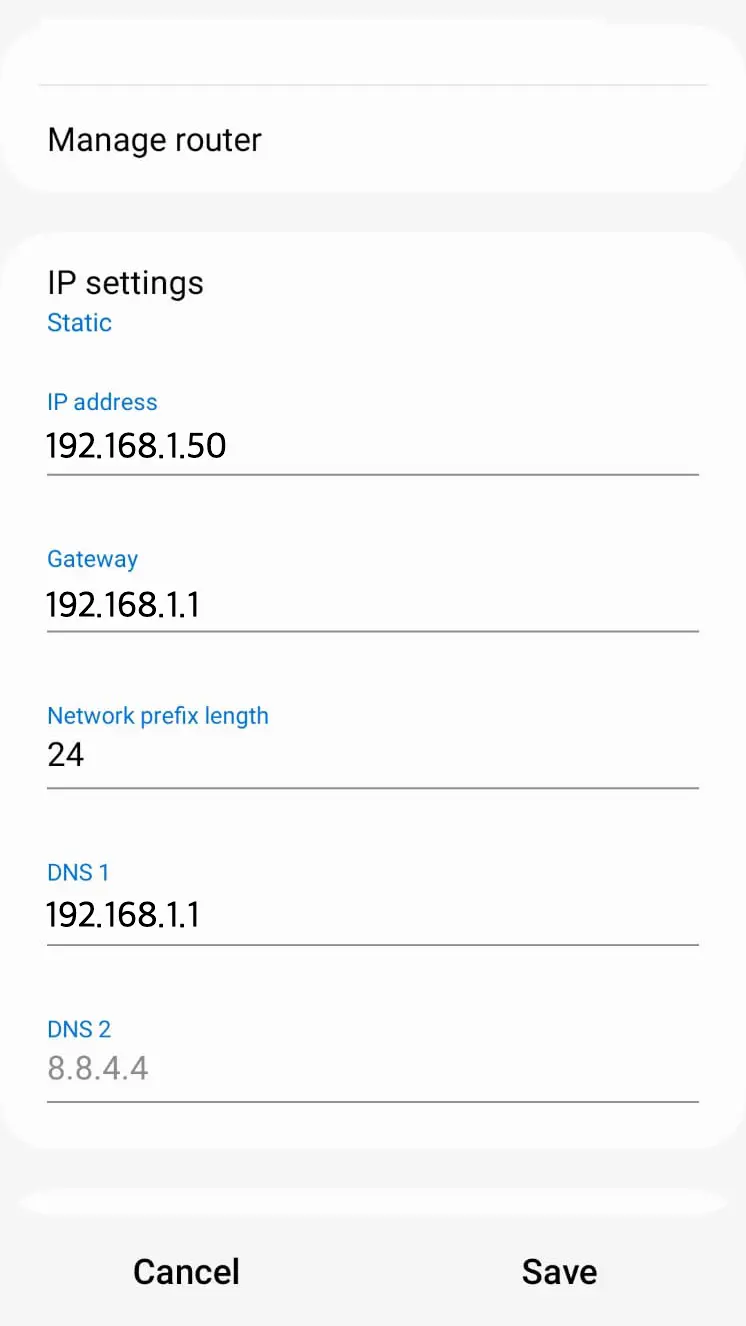
- Change “DHCP” to “Static”.
- Now you can specify the IP address. Tap the SAVE button once completed.
Change Android global IP address
If you want to change the global IP address on Android, turn off mobile data communication, disconnect from the Internet, and reconnect, and the assigned global IP address will change.
- Disable Wi-Fi on your Android and make sure it’s on mobile data.
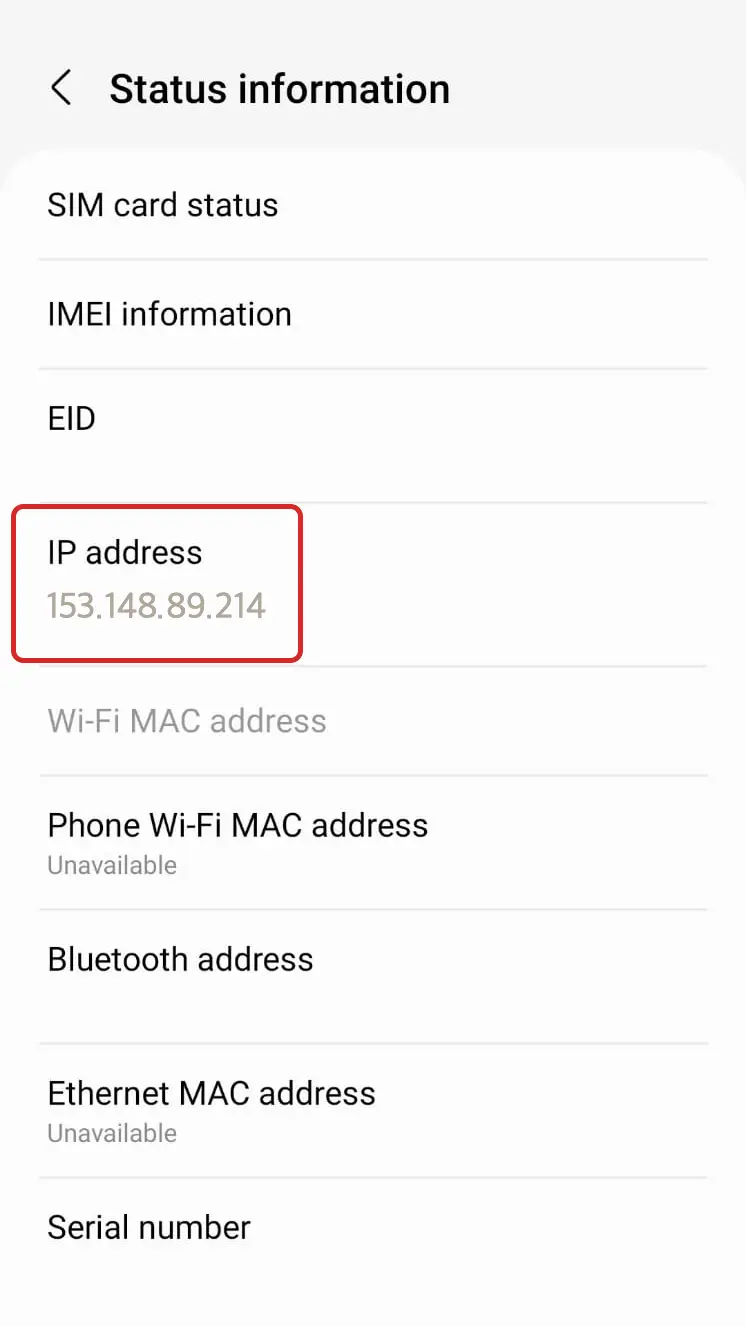
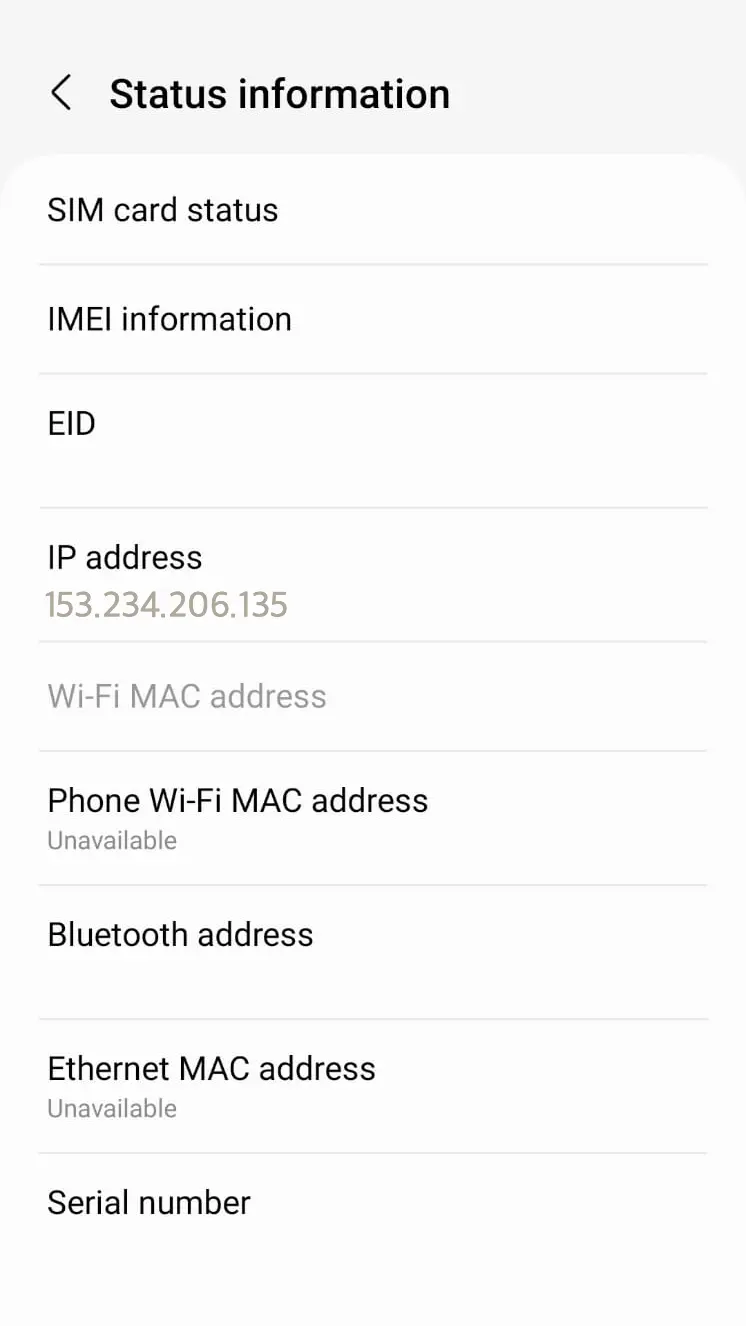
- From Android, “Settings”, tap “About Phone”, → “Status Information”, and check the current global IP address from “IP address”.
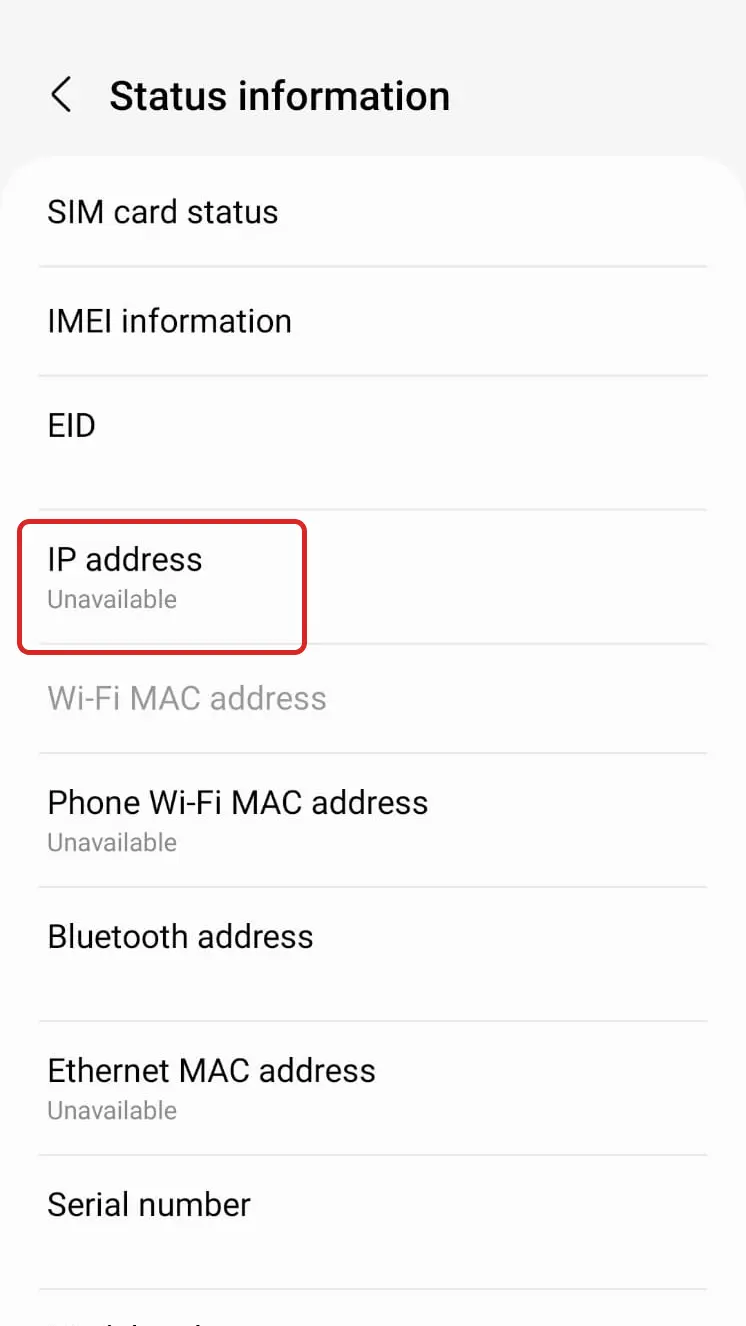
- Disconnect mobile data communication on Android.
- When I check the IP address from “Settings”, it shows that it has not been assigned an IP address and is “Unavailable” because it is disconnected from all networks.
- Enable mobile data communication on your Android and connect to the network again. When you check the IP address, it has been changed from the IP address before disconnection.

Remember that for static and dynamic IP address changes, it’s essential to ensure the IP address you specify is not used by another device on your network to avoid conflicts. Also, the steps may slightly differ based on your device’s manufacturer and Android version, but the general process remains the same.
Summary
This time, we explained how to change local and global IP addresses on iOS and Android.
You might not need to think much about IP addresses in everyday smartphone use. However, knowing how to change your smartphone’s IP address can be handy in specific scenarios such as internet connectivity issues, challenges accessing web services, or ensuring unique IP addresses on your network.
Just remember to be cautious when assigning static IP addresses to avoid conflicts, and ensure that the IP address you select is unique within your network. These steps can help you overcome network-related problems and ensure smooth data communication.
Topics: Domain
Don’t forget to share this post!